- < Experiment 32
-
Experiment 33 v2
- Experiment 34 >
Creating a marble run

Can you design and create a marble run that will allow the marble to travel at least 3 metres from top to bottom?
Purpose
This experiment gives children an opportunity to practice measuring and adding lengths.
The child will learn how to apply maths and creative skills to create their own toys.
You need to know
- how to measure length with a ruler
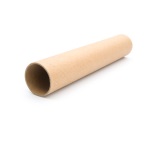
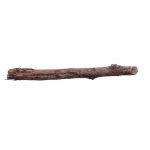
You will need


Steps
-
Decide where to build your marble run.
You may build it attached to a wall or a large piece of cardboard, or you may want to stand on its own using sticks and other materials as support.
- Gather the materials you will use to make your marble run.
-
Draw a design for your marble run on paper.
Make your design exciting by using tunnels, ramps, curved paths, and even steps.
- Build your marble run following your design. Measure the marble path to make sure it is at least 3 meters in length.
-
Test your marble run to make sure that the marbles cruise through the paths seamlessly without going off track.
Make adjustments if necessary.
Hint
Remember that the marble must travel at least three metres, but it can zig zag to get there.
Questions
- How far does the marble travel in total?
- How many seconds does it take a marble to travel the structure from top to bottom?
- Did any marbles go off the tracks? If so, how did you fix the problem?
- How can you improve the design?
Expected answers
-
The marble run should measure at least three metres to complete this experiment.
-
Actual results would depend on materials and design.
What’s important is that the child made the accurate time measurement, preferably by timing it several times and taking an average.
-
There is a high possibility that some marbles would go off the tracks during the initial testing of the structure.
What’s important is that you allow the child identify the problems and fix them on their own.
-
After playing with it for some time, it is expected that the child would realize that the marble run could still use many improvements.
It could be by making it larger, by adding new features, by using better materials, or even by adding something that would make the marbles go back to the top on their own.
Explore further (optional)
You may also try constructing a similar structure, but this time use toy cars instead of marbles. Creating a similar structure that uses water can be a fun weekend building activity too.
Tips for further exploration
A toy car run would be similar but on a larger scale. Using water adds a new level of complexity, since the run must be made waterproof.


